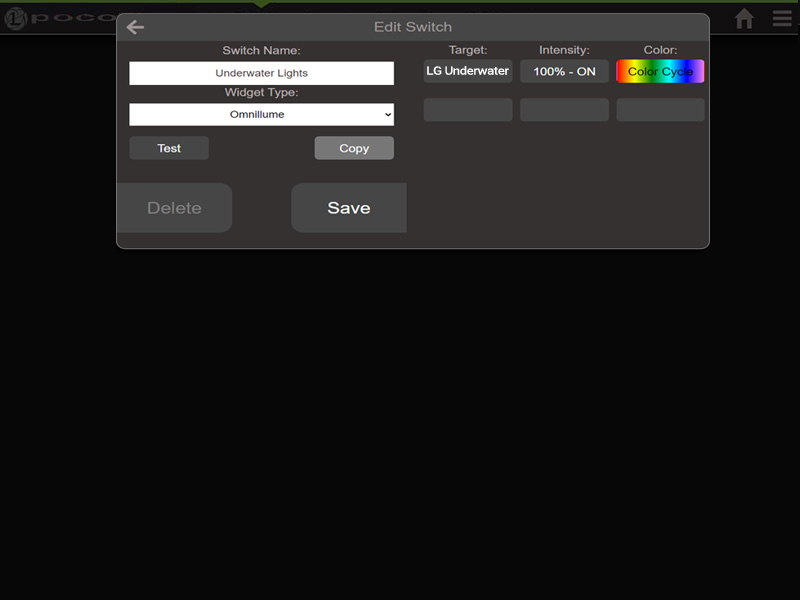
The Switch tab is where you set up the functions of the light, this is how the light will behave after the switch is activated. Color, intensity, and type of switch widget (widgets are covered in a previous section).
How to Setup a Switch
Before you set up a Switch you must have created a Light Group for your light.
Directions:
- Go to the Switches Menu.
- Select “Add a Switch” to launch the setup window.
- Give the switch name, this is what will appear on the display and mobile App.
- Select a Widget type (switch type, covered in a previous section)
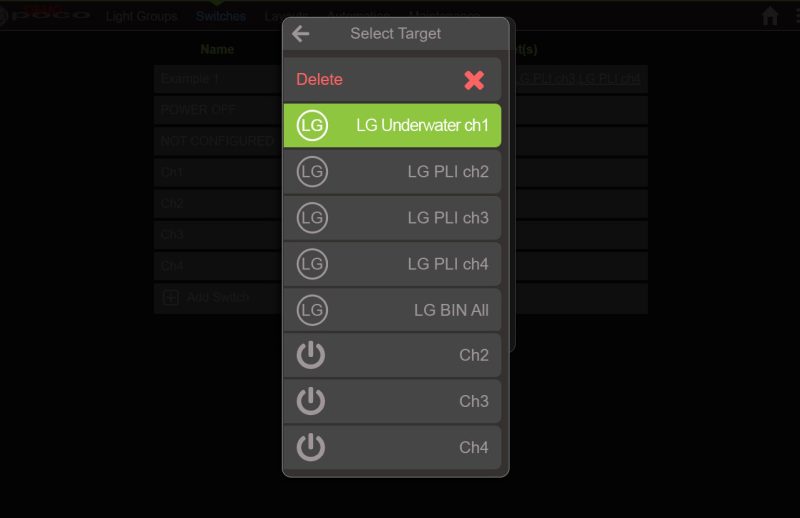
- In the box below “Target” you will select the Light Group you created previously under the Light Group tab.
- The default light intensity is set to 100%. If you would like to change this, click on the 100% and select a value between 0% and 100%.
- “Color” is where you set the default color for the light on switch activation.
- You now have an option to “Test” the setup before you save the setting.
- Click Save

Note: Under the “Target” menu existing Light Groups and Switches will be listed together. Light Groups are denoted with an “LG” icon and Switches will have a “Power” symbol icon.

You are ready to move on to Layouts.
